This post started off as a small guide mainly for my own reference, but it’s grown into a good overview of why Vim is so great for Rails development – if you’re unconvinced, just read through the killer commands listed below… you’ll soon see how Vim could make life a lot easier for you – and I’m only scratching the surface here!
Basic install
First up, install MacVim (or Vim for your platform)
Then install the Janus: Vim Distribution which is the defacto Rails Vim distro.
Adding the CodeSchool theme
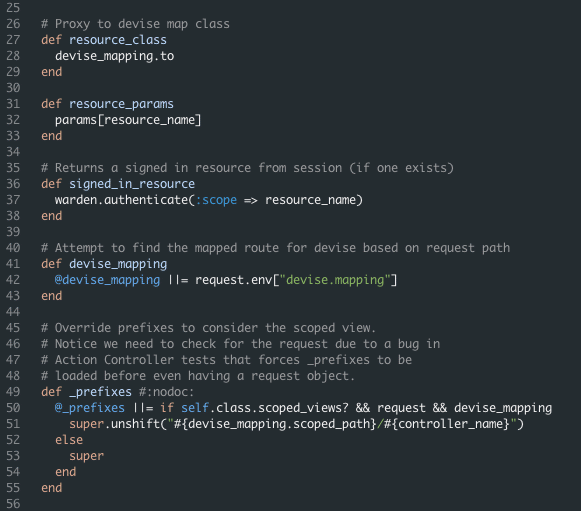
Although Janus comes with plenty of themes, I prefer my old TextMate theme (which I created to mimic the CodeSchool theme used in their Rails Best Practises course) …it’s just so easy on the eye, and going by my stats, quite popular.

You can see what a full page looks like by clicking here (Note: I have since added a slight background to the line numbers as I feel that makes it easier to see indentation levels).
Download the theme from here, unzip it and place the codeschool.vim file in ~/.vim/colors
Then, open ~/.gvimrc.afterand inside that paste (and save):
set guifont=Monaco:h12
let g:NERDTreeWinPos = "right"
set guioptions-=T " Removes top toolbar
set guioptions-=r " Removes right hand scroll bar
set go-=L " Removes left hand scroll bar
autocmd User Rails let b:surround_{char2nr('-')} = "<% \r %>" " displays <% %> correctly
:set cpoptions+=$ " puts a $ marker for the end of words/lines in cw/c$ commands
To add some breathing space at the top, in terminal type:
defaults write org.vim.MacVim MMTextInsetTop ‘5’
Ok that’s the theme sorted. You might have noticed I moved the NERDTree to the right hand side, which is where I prefer it – if you prefer the left omit that line.
Some basics
First, pick up the basics by going to your command line and typing vimtutor (and enter). It’s a really good, albeit short, introduction. Then (for those of us coming from tab-based editors) here’s a few tips you might find handy:
CTRL Ww moves you from window to window (i.e nerdtree to window and vice versa)
CTRL WT moves current window into a tab
t (While in nerdtree) opens the file in a tab.
gt Goes to next tab.
gT Goes to previous tab.
\n Toggles the NerdTree on or off.
Command T Similar to TextMate’s find in project. Try to navigate by directory rather than file name. While there CTRL T opens in a tab, or Escape closes it.
df [character] deletes to character, eg df_ will delete to the next underscore
I just want to add that although the above covers tabs, tab’s are one thing you will probably use quite differently in Vim… Vim has a really awesome package of buffers + tabs + split windows – which will probably mean a different, more flexible and pleasant workflow 🙂 I might do a blog post about it later (stay tuned!) but for now just be prepared to move away from endless tabs – if that’s what you were used to before.
Here are are the erb tags:
CTRL S = <%= %> erb tags
CTRL S – <% -%> erb tags
CTRL S # <%# %> erb tags
Some killer commands
Here is the first batch of killer commands I have found – do you know more? Please let me know and I’ll add them! Most of these come courtesy of Tim Pope and his rails.vim plug-in (which is installed with Janus).
:Rmodel dog you can replace ‘model’ with controller or view (or helper, test, etc) and then enter the name of the controller or view you want. Pretty awesome huh?
:Rmodel will take you to the associated Model depending on which file you are in. Also works with: :Rcontroller :Renvironment :Rfixtures :Rhelper :Rjavascript :Rlayout :Rlib :Rmailer :Rmigration :Rmodel :Robserver :Rtask :Rview :Rspec
:Rfind file-name will take you to the file directly.
:Rgenerate (options) same as rails g in terminal.
:A goes to the alternate file (eg the associated test file)
:AS same as above, but in split
:AV same as above, but in vertical split
:R goes to the related file, so if the cursor is on the ‘show’ method of a controller – it will take you to the show view.
:RS same as above, but in split
:RV same as above, but in vertical split
gf – go to related file depending on where your cursor is (see :R above)
CTRL Wgf same as above but in a new tab
CTRL Wf same as above but in new split window.
:Rake task-name runs the rake task
There are lots more – check out the Rails.vim link below for them all.
:NERDTreeFind will show you the location of the file you are in, inside NERDTree (and open NERDTree if it is not open). Thanks to Rafał for that tip!
While in NERDTree, press m for menu – then you can add/delete/rename etc Thanks to Les for that tip!
Command-Shift-F find in project (though you need ‘Ack’ for this to work – on Mac, install with brew install ack) Thanks to Chris for this tip!
:sp splits your screen (can be used multiple times)
:vsp splits your screen as above – but vertically.
Be sure to check out the ‘Learning Vim’ link below – there, I post tips on how you can master the basics of Vim, easily and quickly.
Further reading & learning resources
– Daniel Fishcher’s TextMate to Vim post
– Thoughtbot’s Intro to Rails Vim video
– Rails.vim awesome command list
Well that’s it for now, I hope this post has shown you not only how to set up Vim, but a few of the basic commands as well as some of the killer features that makes Vim so great for Rails development. I hope you’ll have as much fun with it as I think I will!
